OK - this may be the slowest Blog update in history, but this year has been pretty hectic as I have been working in Sierra Leone from Jan to June and while I was there my trusty laptop suffered a hard drive failure, which combined with a lack of internet made completing this post impossible until now.
Over the Christmas period I spent as much time as possible on the engine rebuild, a lot of which was included in earlier updates. This post is more of a pictorial record of the rebuild and the new anciliary parts that were added to the block
With the internal rebuild complete and the head back it was time to add some shinny bits.
 |
| New Fuel lift pump ready for fitting |
As far as I am aware the high pressure injector pump is in good condition and so I am going to use the original one for now as a new or rebuilt one is a large sum of cash to spend especially if I do not need to. The pump that is more prone to wear and is a cheap item to replace is the lift pump so I opted to replace that and all of the fuel lines (to be included in a later post)
 |
| Forget the Haynes Manual - for a rebuild this is what you need! |
During the rebuild it quickly became apparent that the MOD manuals exclude a lot of the technical details that you need to get to grips with so I bought a proper Land Rover Workshop manual on line via EBay - considerably cheaper than from Paddock.
 |
| The engine starts to look more like an engine and not just a pile of bits |
 |
| Rather than paint the alloy parts silver I media blasted them and then laquared them |
One of the larger bolt on bits is the turbo and exhaust manifold - the picture above shown my nice clean Garret Turbo which is part of the Allard Turbo Stage 2 engine upgrade. This along with a larger inter cooler, new turbo pipes, blanking off the EGR valve and tweaking the injector fuel pump should I hope get the power up from circa 115 / 120 Bhp to around 150 Bhp.
 |
| New engine mounds are fitted to refurbished brackets |
 |
| Getting past the engine in the workshop becomes a problem due to it's width |
As bits are added to the engine I start to find that my workshop is not wide enough and that getting past the engine on its stand becomes more and more of a challenge!
 |
| New brass bush fitted to crankshaft end |
 |
| Fitting the rear crankshaft seal |
 |
| New starter motor is fitted |
 |
Cutting new thread in bottom of belt housing
|
 |
| Not pretty but effective - new Garret turbo sealed up to stop dirt etc getting in |
 |
| New heavy duty clutch and plate fitted -blue thing is improvised centring tool |
 |
Painting the engine mount brackets after media blasting
 |
Drilling out holes in repaired section of Bell housing
|
|
 |
| Bell housing fitted back on to rebuilt gearbox |
In early February I was able to lift the engine off the build stand put it back on the chassis - one step forward and a lot more space in the workshop!
As well as completing most of the engine rebuild I managed to spend some time starting to prepare the gear box and transfer box for refitting. When I bought the Land Rover, the bell housing had shown signs of some historic damage as the casting around one of the bolt holes (engine face) had a piece missing. This was repaired by Jones Fabrication in Kirkintilloch and at the same time the bell housing was checked for any other signs of damage (none found).
 |
| Starting to prepare the bulkhead - wash with Milton solution |
In early February we had a short spell of good weather which allowed me to wash down the new galvanised bulkhead in T wash
 |
Damage to the bulkhead during galvanising -
|
After washing the bulkhead I set about repairing some of the minor damage that had occurred during galvanising. Zinc had built up in the top of one of the door pillars - this had to be cut out (nearly 0.5kg) and then the panel closed and made good by welding
 |
| Cutting back metal to remove zinc deposit inside hollow section |
 |
| Zinc build up |
 |
| Removed zinc - nearly half a kilo! |
 |
| Petrol tank refitted after being taken back to bear metal and painted |
With the engine back on the chassis the gear box and transfer box could now be fitted - normally a pretty straight forward job, but I ran in to a small set back when the gear box would not mate with the engine. A lot of head scratching later I discovered that the new brass bush that I had inserted into the crankshaft was too tight to accept the gear box shaft - once the problem was identified it was easily fixed with a bit of emery paper.
Early on in the build I took the decision to have the gear box and transfer box both rebuilt at Ashcroft transmissions. The R380 gearbox was rebuilt LTD 230 box was completely rebuilt and upgraded by the inclusion of heavy duty bearings, HD pump and new input shaft.
The transfer box was rebuilt keeping the original 1.410 ratio, but with the addition of a sleeved casing and the big item an an automatic torque biasing centre differential.
A little background on the LT230 centre diff as taken from the Ashcroft web page (they describe it better than I can) "The centre diff is there to allow the props to turn at different speeds when cornering to stop drive train wind up. The speed difference is quite small and the centre diff gears are only designed to cope with these low speeds. If you are Off Road on snow or ice and you get wheel spin from one front wheel, what will happen is the rear prop will not be moving, the front will thus be going double speed, this means the small centre diff gears will be spinning like fury and after a matter of only a few seconds the planet gears will friction weld to the cross pins and the gears will fail etc. Of course in this situation the centre diff should be locked to avoid failure.
There are instances when it's not convenient to keep the diff locked or to constantly lock and unlock the diff as the available traction dictates, i.e, when racing fast on a low traction surface, the vehicle will not handle well when locked but is likely to wheel spin when unlocked.
Another example of where the ATB would help would be when rapidly changing from high to low traction surfaces, i.e. when driving on snow or ice,
In both of these examples the ATB will limit the amount the difference in prop shaft speed and transfer torque to the axle with traction.
The two big advantages are increased traction when unlocked and eliminating the weakness of the stock unlocked centre diff."
 |
| Gear box and transfer box go back together |
 |
| Transfer box ratio |
 |
| Slick shift conversion fitted |
The only other modification that I made to the gearbox and transfer box was the addition of a Slick Shift conversion. This simple upgrade basically reduces the movement needed in the gear lever between gear positions.
 |
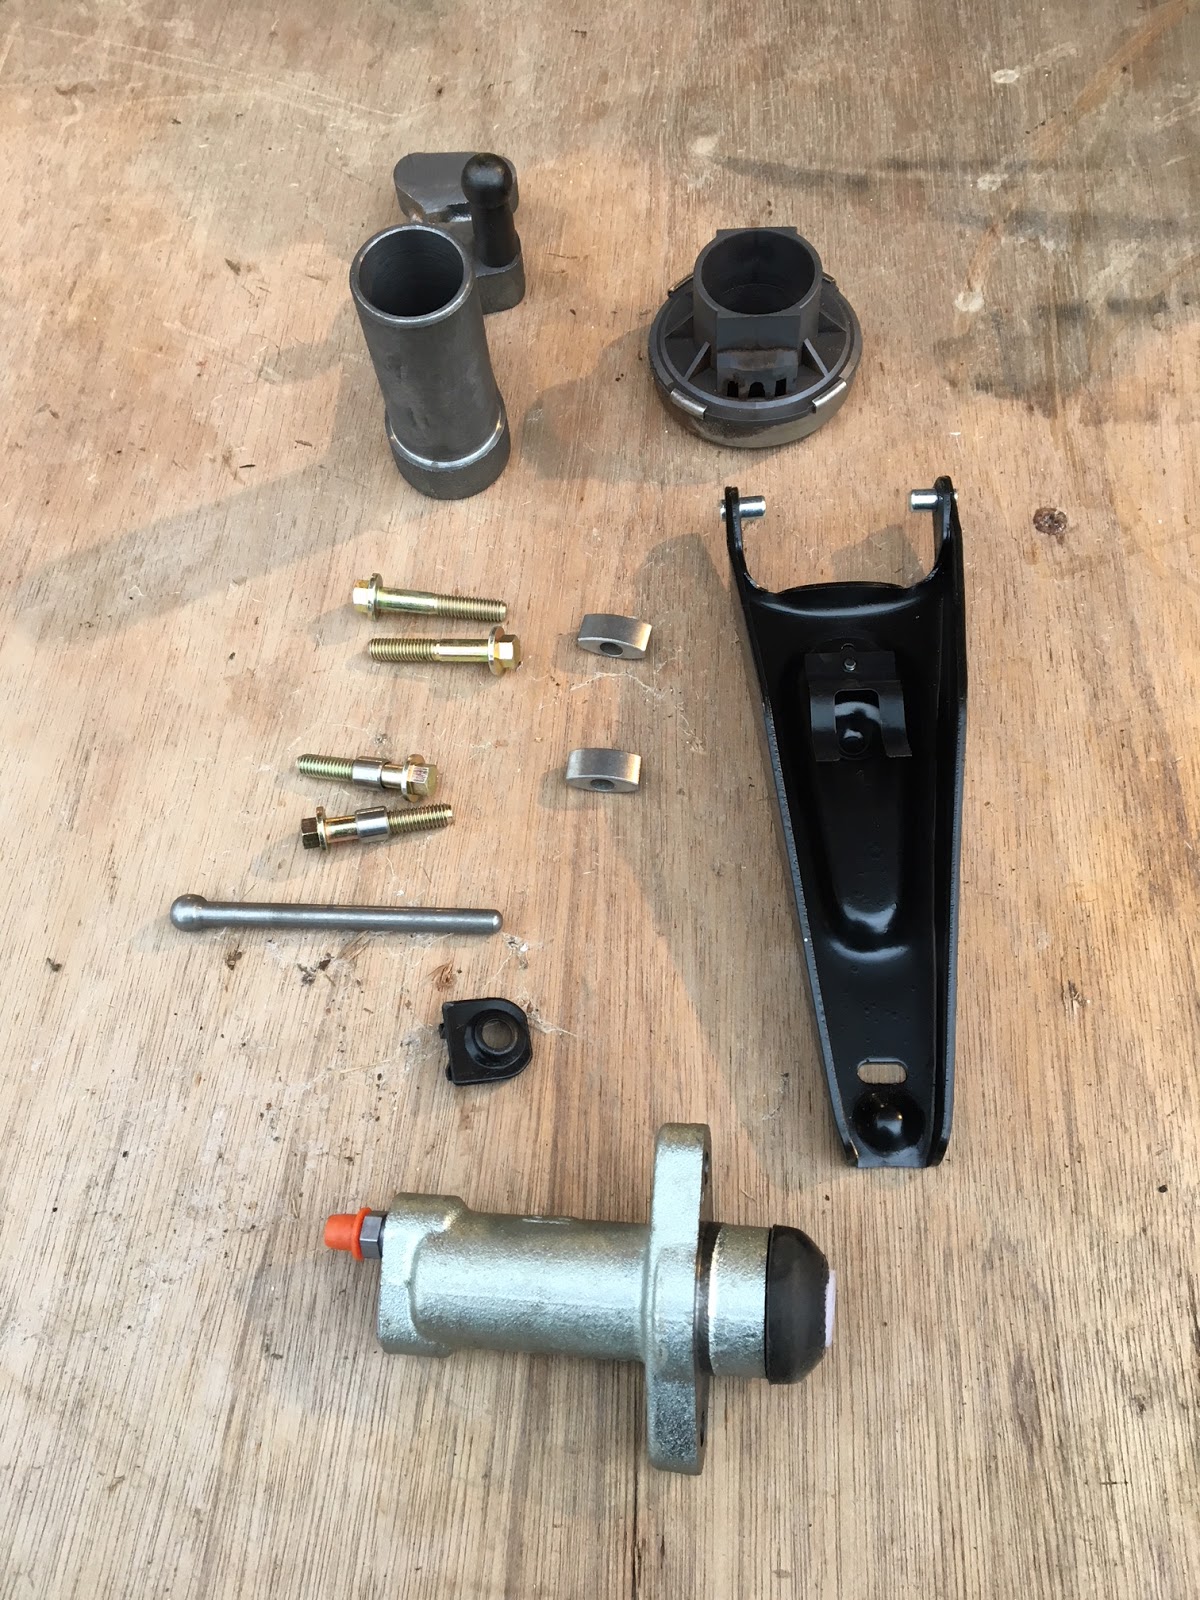
| New clutch mechanism ready to be fitted |
 |
| Fitting the gearbox and transfer box |
 |
| Bulkhead trial fit |
 |
| Running a tap down the captive bolts to remove zinc after galvanising |
The last thing that I wanted to do before heading off to Africa until June was to fit the prop shafts, but during its life with the MOD the rear shaft had been severely abused, damaged and bent. This necessitated having the rear shaft re - tubed which I did at Propshaft services in Bonnybridge, where their engineers simply cut both ends off and replaced the damaged tube with a new one.
 |
| Propshaft in for re- tubing due to extent of damage |
 |
The original universal joints on the prop shaft had seen better days
|
 |
Significant lack of maintenance - beware buyers of MOD vehicles
 |
Propshaft damage
 |
Removing the UJ x 4
|
|
|


No comments:
Post a Comment
Note: only a member of this blog may post a comment.